Difference between revisions of "VTube Communication with YLM Benders"
(→VTube-LASER Correction Steps for YLM Benders) |
(→VTube-LASER CORRECTION Steps for YLM Benders) |
||
| Line 37: | Line 37: | ||
</tr> | </tr> | ||
</table> | </table> | ||
| + | |||
| + | ==Using [[VTube-LASER]] to send NEW MASTER Data to YLM Benders== | ||
| + | |||
| + | <table> | ||
| + | <tr valign=top> | ||
| + | <td width=600> | ||
| + | The connection the bender is made with standard network connection, and a shared folder location between the VTube computer and the operator station computer.<br><br> | ||
| + | |||
| + | For a NEW TUBE, the YLM takes in VTube MASTER Supravision LRA data in a Supravision file.<br><br> | ||
| + | > | ||
| + | |||
| + | </td> | ||
| + | <td width=400> | ||
| + | </td> | ||
| + | </tr> | ||
| + | </table> | ||
| + | |||
| + | |||
| + | ===Follow these steps at VTube-LASER to Send a NEW TUBE SETUP to a YLM Bender=== | ||
| + | <table> | ||
| + | <tr valign=top> | ||
| + | <td width=300> | ||
| + | STEP 1<br> | ||
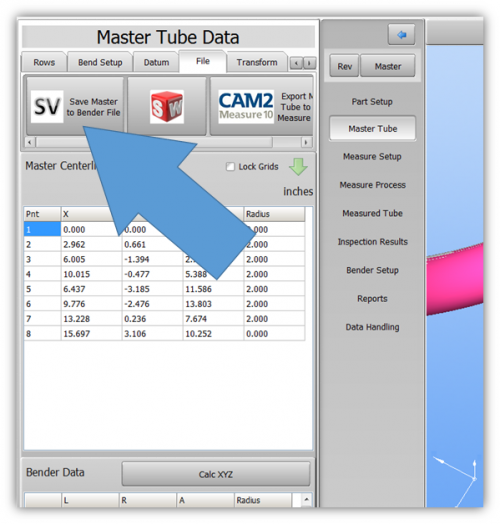
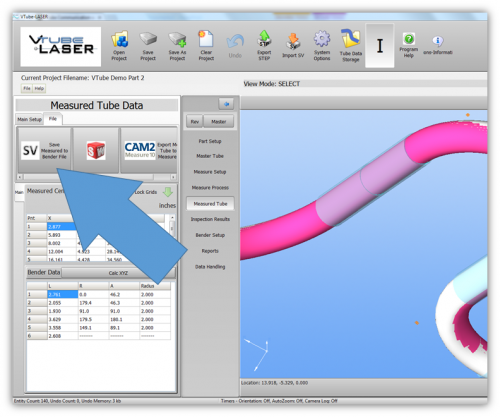
| + | Switch to the MASTER TUBE window and press the FILE tab.<br><br> | ||
| + | STEP 2<br> | ||
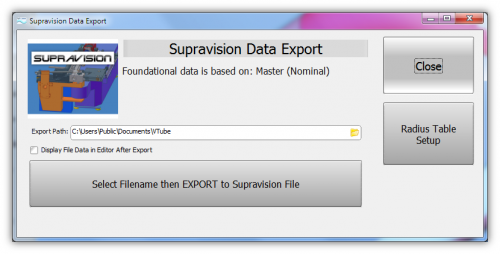
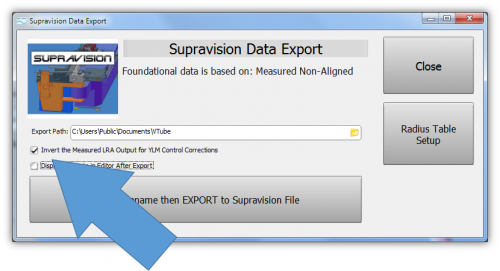
| + | Save the Supravision file.<br><br> | ||
| + | STEP 3<br> | ||
| + | Move to the YLM control and follow the steps below to import the new data. | ||
| + | </td> | ||
| + | <td width=400> | ||
| + | [[image:vtube-laser-1.96_SaveMasterSupravisionData.png|500px]]<br><br> | ||
| + | [[image:vtube-laser-1.96_SupravisionExportMenu_Master.png|500px]]<br><br> | ||
| + | </td> | ||
| + | </tr> | ||
| + | </table> | ||
| + | |||
| + | ===Follow these steps at the YLM CONTROL to import the measured data from VTube-LASER=== | ||
| + | |||
| + | <table> | ||
| + | <tr valign=top> | ||
| + | <td width=300> | ||
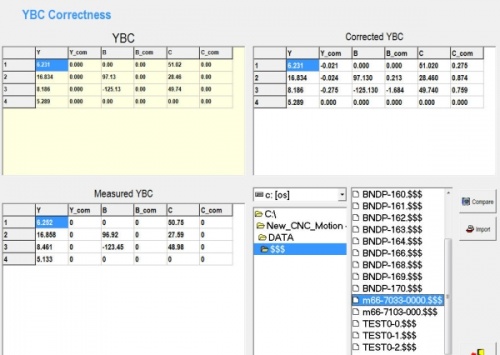
| + | STEP 1<br>In the YLM YBC menu, click on CORRECTION.<br><br> | ||
| + | STEP 2<br>Search for and select the $$$ file that was created by VTube-LASER.<br><br> | ||
| + | STEP 3<br>Select COMPARE to bring the data into the YLM control. The COMPARE button will only display when a file is selected.<br><br> | ||
| + | STEP 4<br>Press the IMPORT button to import the new data and change the compensation fields in the upper right corner of the Correction screen.<br><br> | ||
| + | </td> | ||
| + | <td width=400> | ||
| + | [[image:YLM_Import_Screen.jpg|500px]]<br> | ||
| + | </td> | ||
| + | </tr> | ||
| + | </table> | ||
| + | |||
| + | |||
==[[VTube-LASER]] CORRECTION Steps for YLM Benders== | ==[[VTube-LASER]] CORRECTION Steps for YLM Benders== | ||
Revision as of 01:53, 24 September 2014
|
|
Contents |
YLM Control software
|
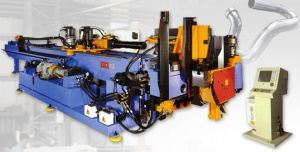
The YLM Windows software allows for complete programming of bender setup. It includes a bender simulator. |
VTube-STEP and VTube-LASER Support for YLM Benders
|
VTube-STEP can export Supravision data to YLM benders. |
Using VTube-LASER to send NEW MASTER Data to YLM Benders
|
The connection the bender is made with standard network connection, and a shared folder location between the VTube computer and the operator station computer. For a NEW TUBE, the YLM takes in VTube MASTER Supravision LRA data in a Supravision file. |
Follow these steps at VTube-LASER to Send a NEW TUBE SETUP to a YLM Bender
|
STEP 1 |
Follow these steps at the YLM CONTROL to import the measured data from VTube-LASER
|
STEP 1 |
VTube-LASER CORRECTION Steps for YLM Benders
|
The connection the bender is made with standard network connection, and a shared folder location between the VTube computer and the operator station computer.
|
Follow these steps at VTube-LASER to Correct a YLM Bender
|
STEP 1 |
Follow these steps at the YLM CONTROL to import the measured data from VTube-LASER
|
STEP 1 |
Other Pages
- See VTube-LASER
- See VTube-STEP
