Difference between revisions of "How to Install a CNC Bender Upgrade"
From ATTWiki
| Line 1: | Line 1: | ||
[[image:cncbender_logo.jpg|400px]] | [[image:cncbender_logo.jpg|400px]] | ||
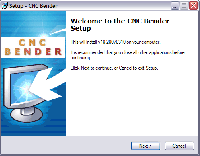
| − | [[image:Cncbender_setup_dialog.png|right | + | [[image:Cncbender_setup_dialog.png|right]] |
SELF-INSTALL a CNC BENDER UPGRADE following these steps | SELF-INSTALL a CNC BENDER UPGRADE following these steps | ||
Revision as of 19:32, 8 October 2007
SELF-INSTALL a CNC BENDER UPGRADE following these steps
- STEP 1
Download the setup file from the revision page.
- STEP 2
Get a password from Advanced Tubular for unlocking the setup file.
- STEP 3
Copy the setup program to a USB flash drive.
- STEP 4
Close CNC Bender software.
- STEP 5
Close the CNC Bender Loader when it reappears. The newer non-button versions of this loader will unload if you right-click on them.
- STEP 6
Plug the USB drive into a USB port on the CNC Bender operator station. The older systems have USB ports inside the operator station. Some have USB ports installed on the enclosure. Newer Magelis controls feature a USB port on the front of the PC Panel bezel.
- STEP 7
Run the setup program
- STEP 8
When the setup program is complete, remove the USB drive using the safe removal procedure. (See Safely Remove a USB Drive)
- STEP 9
Run the CNC Bender Loader by finding it in your START/All Programs/Startup menu.
- STEP 10
Run CNC Bender by pressing on the Loader


