Difference between revisions of "VTube-LASER v1.91"
(→25px NEW: Use Leapfrog To Measure Tubes Longer Than the Arm's Reach) |
(→25px NEW: Use Leapfrog To Measure Tubes Longer Than the Arm's Reach) |
||
| (2 intermediate revisions by one user not shown) | |||
| Line 29: | Line 29: | ||
<td width=400> | <td width=400> | ||
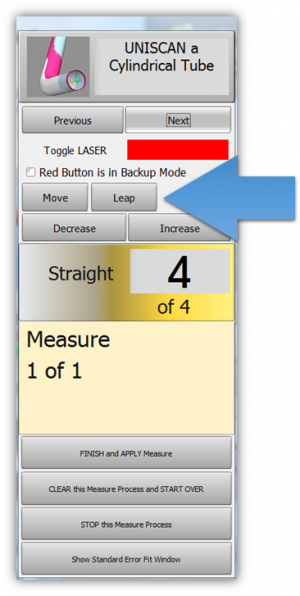
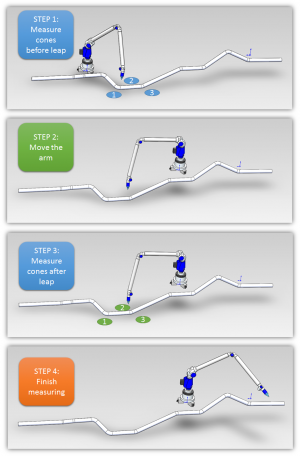
The new Leapfrog feature allows you to measure any length of tube by measuring three or more conical calibration targets, leaping the targets with the FARO arm, then measuring them again - then continuing measuring from where you left off before the leap.<br><br> | The new Leapfrog feature allows you to measure any length of tube by measuring three or more conical calibration targets, leaping the targets with the FARO arm, then measuring them again - then continuing measuring from where you left off before the leap.<br><br> | ||
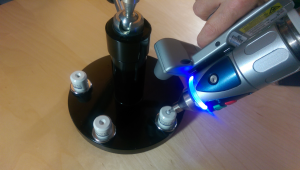
| − | See VTube-LASER [[Calibration-Leapfrog-Move Targets]].<br><br> | + | See VTube-LASER [[Calibration-Leapfrog-Move Targets]] for information on Advanced Tubular targets.<br><br> |
A leap can occur at any point during any tube measurement.<br><br> | A leap can occur at any point during any tube measurement.<br><br> | ||
Leapfrog moves are more accurate than using the "Move Tube" command because they rely on more precise conical seats.<br><br> | Leapfrog moves are more accurate than using the "Move Tube" command because they rely on more precise conical seats.<br><br> | ||
| Line 37: | Line 37: | ||
</td> | </td> | ||
<td width=300> | <td width=300> | ||
| − | [[image:vtube- | + | [[image:vtube-laser_targets_ballprobe.png|300px]]<br><br> |
[[image:vtube-laser-1.91-leapfrog_illustration.png|300px]]<br><br> | [[image:vtube-laser-1.91-leapfrog_illustration.png|300px]]<br><br> | ||
[[image:vtube-lasesr-1.91-leapfrog_points_after_leap.png|300px]]<br><br> | [[image:vtube-lasesr-1.91-leapfrog_points_after_leap.png|300px]]<br><br> | ||
Latest revision as of 20:09, 11 May 2015
Revision 1.91
|
- See VTube-LASER Customer Support Page to download the latest version.
 NEW: Use Leapfrog To Measure Tubes Longer Than the Arm's Reach
|
The new Leapfrog feature allows you to measure any length of tube by measuring three or more conical calibration targets, leaping the targets with the FARO arm, then measuring them again - then continuing measuring from where you left off before the leap. |
 NEW: Redesign for XYZ INTERSECTION Inspection Values
The data shown on the right is from the new Expanded Grid (see "Expanded Grid" section below). |
 NEW: Redesign for XYZ TANGENT Inspection Values
The data shown on the right is from the new Expanded Grid (see "Expanded Grid" section below). |
 NEW: Expanded Grid Window for Inspection Data, Send to MS Office
|
The XYZ Intersection deviation and the XYZ Tangent point deviation values can now be displayed in the Expanded Grid window.
|
 NEW: XYZ Intersection +/- Tolerance Values in Printed Reports
|
The new XYZ Intersection deviation values are included in reports:
|
 NEW: Tangent Values in Printed Reports
|
The new XYZ tangent point out of tolerance values can now be included in reports: |
 ENHANCED and NEW: Alignment Feature Changes
FEATURE 1 - ALIGNMENT ENGINE: Fixes and Significantly More Powerful
The automatic end weighting Best Fit alignment method is significantly improved:
Deviation Values Displayed in Progress Window Are CorrectedPrevious deviation values were incorrectly high because they referenced the wrong set of data. This has been repaired. |
Deviations Now Displayed in Real TimeEach iteration of the deviations are shown in real time in the Inspection Data menu. Watch the grids change rapidly as the engine tries new alignments. |
New Added Alignment Engine "Seeking Precision Level" DisplayThe progress window shows the goal precision level the engine is seeking for. For example, if the Automatic Alignment Stop value is 0.75 and the tolerance is 0.059, then the progress window will show "Alignment Engine seeking precision level of: 0.044" (0.75 x 0.059). |
Alignment Engine "Maximum Iterations" Display and LogicThe current iteration and possible maximum iterations for finding the best alignment is now displayed in the progress window.
|
FEATURE 2 - MEASURE COMPLETE WINDOW: Measurement Complete Dialog REDESIGNED with Alignment Choices
|
This new measurement complete dialog gives you more choices than before. It no longer assumes that you want to use the current default alignment method. |
FEATURE 3 - INSPECTION DATA MENU: Alignment Button Displays Alignment Method Selected
|
The Inspection Data recalculate alignment button now displays the currently selected alignment method. This fixes a problem where users had to guess the alignment method when recalculating the measured to master alignment. |
FEATURE 4 - ALIGNMENT MENU: Value RENAMED for Clarity
|
The Automatic Alignment Stop value in the Inspection Data / Alignment menu is renamed to make it more understandable: "Automatic Alignment Stop at Deviation Multiplied Against..." is the new name. |
 NEW: Direct Communications with Eaton Leonard Premier, EL2000, and Ve-log Benders
|
 Enhanced: Project Batch Report Output
 Other Changes
|
Other
- Back to VTube-STEP
- Back to VTube Software Updates (for LASER Mode)
- Back to VTube-LASER
- See VTube Language Editor


