Difference between revisions of "TubeCAD Pro NLM Installation"
From ATTWiki
(→Follow these steps to setup the Network License Manager for use with TubeCAD Pro.) |
(→Follow these steps to setup the Network License Manager for use with TubeCAD Pro.) |
||
| Line 8: | Line 8: | ||
<tr valign="top"> | <tr valign="top"> | ||
| − | <td bgcolor="# | + | <td bgcolor="#E8E8E8" width="100">Step 1</td> |
<td bgcolor="#b0c2e0" width="550"> | <td bgcolor="#b0c2e0" width="550"> | ||
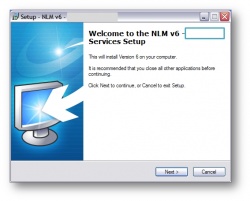
Run the NLM Installation software on the Windows server computer. | Run the NLM Installation software on the Windows server computer. | ||
| Line 18: | Line 18: | ||
<tr valign=top> | <tr valign=top> | ||
| − | <td bgcolor="# | + | <td bgcolor="#E8E8E8 ">Step 2</td> |
<td bgcolor="#b0c2e0"> | <td bgcolor="#b0c2e0"> | ||
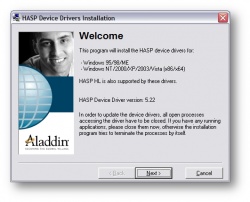
During installation, allow the HASP hardware key driver software to run. | During installation, allow the HASP hardware key driver software to run. | ||
| Line 27: | Line 27: | ||
<tr valign=top> | <tr valign=top> | ||
| − | <td bgcolor="# | + | <td bgcolor="#E8E8E8 ">Step 3</td> |
<td bgcolor="#b0c2e0"> | <td bgcolor="#b0c2e0"> | ||
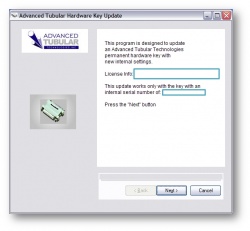
You can plug the hardware key in the computer now. <br><br> | You can plug the hardware key in the computer now. <br><br> | ||
| Line 38: | Line 38: | ||
<tr valign=top> | <tr valign=top> | ||
| − | <td bgcolor="# | + | <td bgcolor="#E8E8E8 ">Step 4</td> |
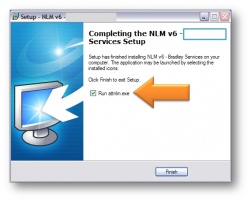
<td bgcolor="#b0c2e0">You can allow the NLM software to load as the installation is closing.<br><br> | <td bgcolor="#b0c2e0">You can allow the NLM software to load as the installation is closing.<br><br> | ||
</td> | </td> | ||
| Line 47: | Line 47: | ||
<tr valign=top> | <tr valign=top> | ||
| − | <td bgcolor="# | + | <td bgcolor="#E8E8E8 ">Step 5</td> |
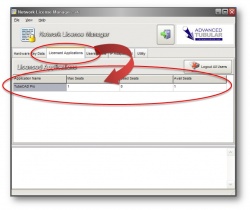
<td bgcolor="#b0c2e0">Click on the "Licensed Applications" tab to be sure '''TubeCAD Pro''' is in the list of licenses. | <td bgcolor="#b0c2e0">Click on the "Licensed Applications" tab to be sure '''TubeCAD Pro''' is in the list of licenses. | ||
<br><br> | <br><br> | ||
| Line 57: | Line 57: | ||
<tr valign=top> | <tr valign=top> | ||
| − | <td bgcolor="# | + | <td bgcolor="#E8E8E8 ">Step 6</td> |
<td bgcolor="#b0c2e0"> | <td bgcolor="#b0c2e0"> | ||
Go to the TubeCAD Pro computer (where it is installed). You'll need to edit the configuration file that is located at:<br><br> | Go to the TubeCAD Pro computer (where it is installed). You'll need to edit the configuration file that is located at:<br><br> | ||
| Line 113: | Line 113: | ||
<tr valign=top> | <tr valign=top> | ||
| − | <td bgcolor="# | + | <td bgcolor="#E8E8E8 ">Step 7</td> |
<td bgcolor="#b0c2e0" width=300>Run TubeCAD Pro. The NLM Server software should report that a user is logged into TubeCAD Pro and that there are the correct seats of the software available. | <td bgcolor="#b0c2e0" width=300>Run TubeCAD Pro. The NLM Server software should report that a user is logged into TubeCAD Pro and that there are the correct seats of the software available. | ||
<br><br> | <br><br> | ||
| Line 120: | Line 120: | ||
<tr valign=top> | <tr valign=top> | ||
| − | <td bgcolor="# | + | <td bgcolor="#E8E8E8 ">Step 8</td> |
<td bgcolor="#b0c2e0" width=300>If TubeCAD Pro does not log into NLM, then it is probable that your Windows firewall is blocking the transfer of data.<br><br> | <td bgcolor="#b0c2e0" width=300>If TubeCAD Pro does not log into NLM, then it is probable that your Windows firewall is blocking the transfer of data.<br><br> | ||
Revision as of 16:18, 24 November 2014
Contents |
Follow these steps to setup the Network License Manager for use with TubeCAD Pro.
Other Pages
- Go back to TubeCAD Pro
- Go back to Network License Manager

