VTube-LASER Cylinder Fit Tolerances

From ATTWiki
Revision as of 17:41, 20 February 2017 by Mcone (Talk | contribs)

Jump to: navigation, search


Vtube-laser logo 1.96.png


Vtube-laser 1.89 mainscreen.png


"How Well Does Centerline Fit the Cylinder Surface Points?"

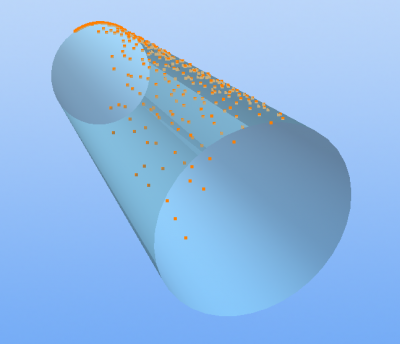
VTube-LASER uses surface points scanned with laser or measured with ball probes to calculate tube centerlines.

Regular tube scans assume that the primitive shape to solve for is a cylinder.

When solving for a cylinder centerline, it's important for you to know the estimated accuracy of the calculation. The estimated accuracy helps you know how confident you can be with the centerline position.

Vtube-laser cylinder surfacepoints.png

The Cylinder Fit Data Window Reports How Well the Centerline Fits the Surface Data

After calculating a cylinder centerline from surface points, VTube-LASER reports how well the centerline FITS the surface points of the cylinder. These values are shown in the Cylinder Fit Data window.

The values reported are...

  • RADIUS: Estimate the maximum deviation of half the diameter.

  • X or Y POSITION: Estimate the deviation of the X or Y positions of the end points of the cylinder.

These estimate values are calculated using statistical math. The values are standard deviation x 2, which means that we have 95% assurance that the these values are the maximum deviation.

Vtube-laser cylinderfitwindow.jpg

Wobble Deviation - The highest of the X or Y values

To simplify visualizing the X and Y Position deviation, we say that the highest of the X and Y values is the "wobble deviation". The wobble deviation in the example on the right is 0.21 inches - because it is the higher of the two values.

If the centerline calculation is very good, then wobble deviation decreases. If the calculation or fit is poor, then the wobble deviation is too high.

This Cylinder Fit Data window is YELLOW because VTube-LASER found that the X and Y Position tolerances were exceeded in the cylinder centerline fit. In this case, VTube asked the operator to remeasure the straight because the wobble deviation was too high as defined by the tolerances in System Options/Measure 1.

Vtube-laser wobbledeviation.png

Default Cylinder Fit Tolerances

To allow VTube-LASER to warn for poor cylinder measurements, it stores tolerances for the allowed deviations during cylinder fit. These values are often setup in the Measure 1 tab of the System Options menu.

The default values are shown in the screen image on the right.

For less precise diameters like exhaust pipes, these settings usually work well. If you measure highly oval or deformed parts, it may be necessary to increase especially the X and Y Position tolerances.

Vtube-laser default CylinderFitTolerances.png


Recommended Aerospace-Grade Cylinder Fit Tolerances

Aerospace-grade materials are often very precise compared to other applications. For aerospace applications, we strongly recommend that you use the tighter tolerances shown here.

The XY Positions are set to 0.030" for longer straights, and 0.050" for shorter straights. ("Short" is also definable with the variable in the lower right corner. It is set to 2" length by default.)

Vtube-laser default CylinderFitTolerances aerospace.png

How to Test for Your Ideal Cylinder Fit Tolerances

You can test for ideal cylinder fit tolerance settings by watching the tolerance values in the Cylinder Fit window when measuring a tube.

You will learn that your material regularly measures with certain maximum fit deviations. After you learn these values, you can adjust the tolerances in System Option to better fit your application and increase the assurance that your centerline is a good fit to the surface data.

To change the default values, be sure to CLEAR the VTube-LASER project first, then press the "Set Project Default State to the current state" button. This will use the new default cylinder fit tolerances for all new projects.

Vtube set default project state to the current state.png

Other Pages