New Drawing Number & Filename Synchronization
Benderlink now asks if the internal drawing number should be reset to be equal to the channel filename if the two names differ at channel save.
This feature is added in case an operator saves a channel part with a new filename. If this is the choice, then operators quite often intend that the internal drawing number also change. The drawing number is the value that displays on the screen on the Chiyoda control.
HOW IT WORKS
Description
|
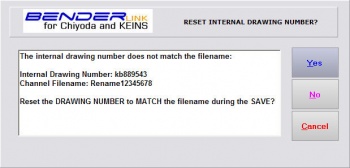
This is an example that starts with an INTERNAL drawing number of kb889543, and is given a new name of Rename12345678 during the SAVE process. See in STEP 5 how Benderlink handles the difference in internal and external names.
|
STEP 1
Press the File Data button in the main menu
|
|
STEP 2
Choose Save Data to File for a single channel
|
|
STEP 3
Type a new filename for this channel data by press the Type Name button.
|
|
STEP 4
Change the new filename on the keyboard
|
|
STEP 5
Press SAVE
|
|
STEP 6
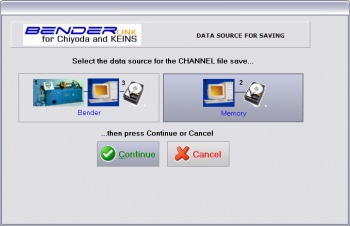
Select the DATA SOURCE then press the CONTINUE button
|
In this example, we are choosing from "Memory" - which only saves the data currently in memory without refreshing the data from the bender first.
|
STEP 7
Benderlink senses that the drawing number and filename do not match.
Select YES, NO, or CANCEL
|
YES: Select YES to synchronize the internal drawing number with the filename before saving the channel (part) file
NO: Select NO to skip synchronization
CANCEL: Select CANCEL to stop the save process entirely
|
STEP 8
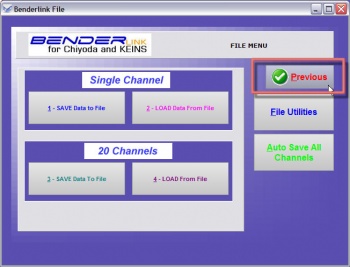
We selected YES, so the FILE SAVE is complete after resetting the drawing number.
Now press the button labeled "PREVIOUS"
|
|
STEP 9
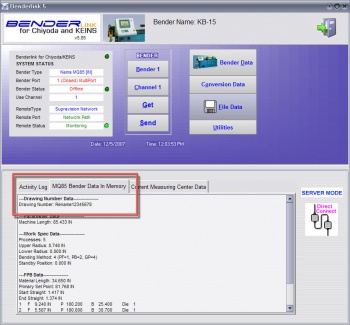
See in the main menu "Bender Data in Memory" log that the internal drawing number name has changed with the file save
|
|
Uniquely Name Benders for Each Bender Number
Benderlink now allows you to program unique names for each bender. As the operator switches benders, the new bender name is displayed on the top of the main Benderlink screen.
The bender name is now also in the Bender Number Selector Window:
HOW TO CONFIGURE THE NAME
Description
|
Use the new field in the Bender Type window in Options to change the value.
(Note: This is a low level menu that usually requires a password for entry.)
|
DO THIS
Select a bender number then enter the new bender name in the edit box.
Enter a unique name for every bender that is active on your Benderlink network.
|
|